
Step #3 - Create a category
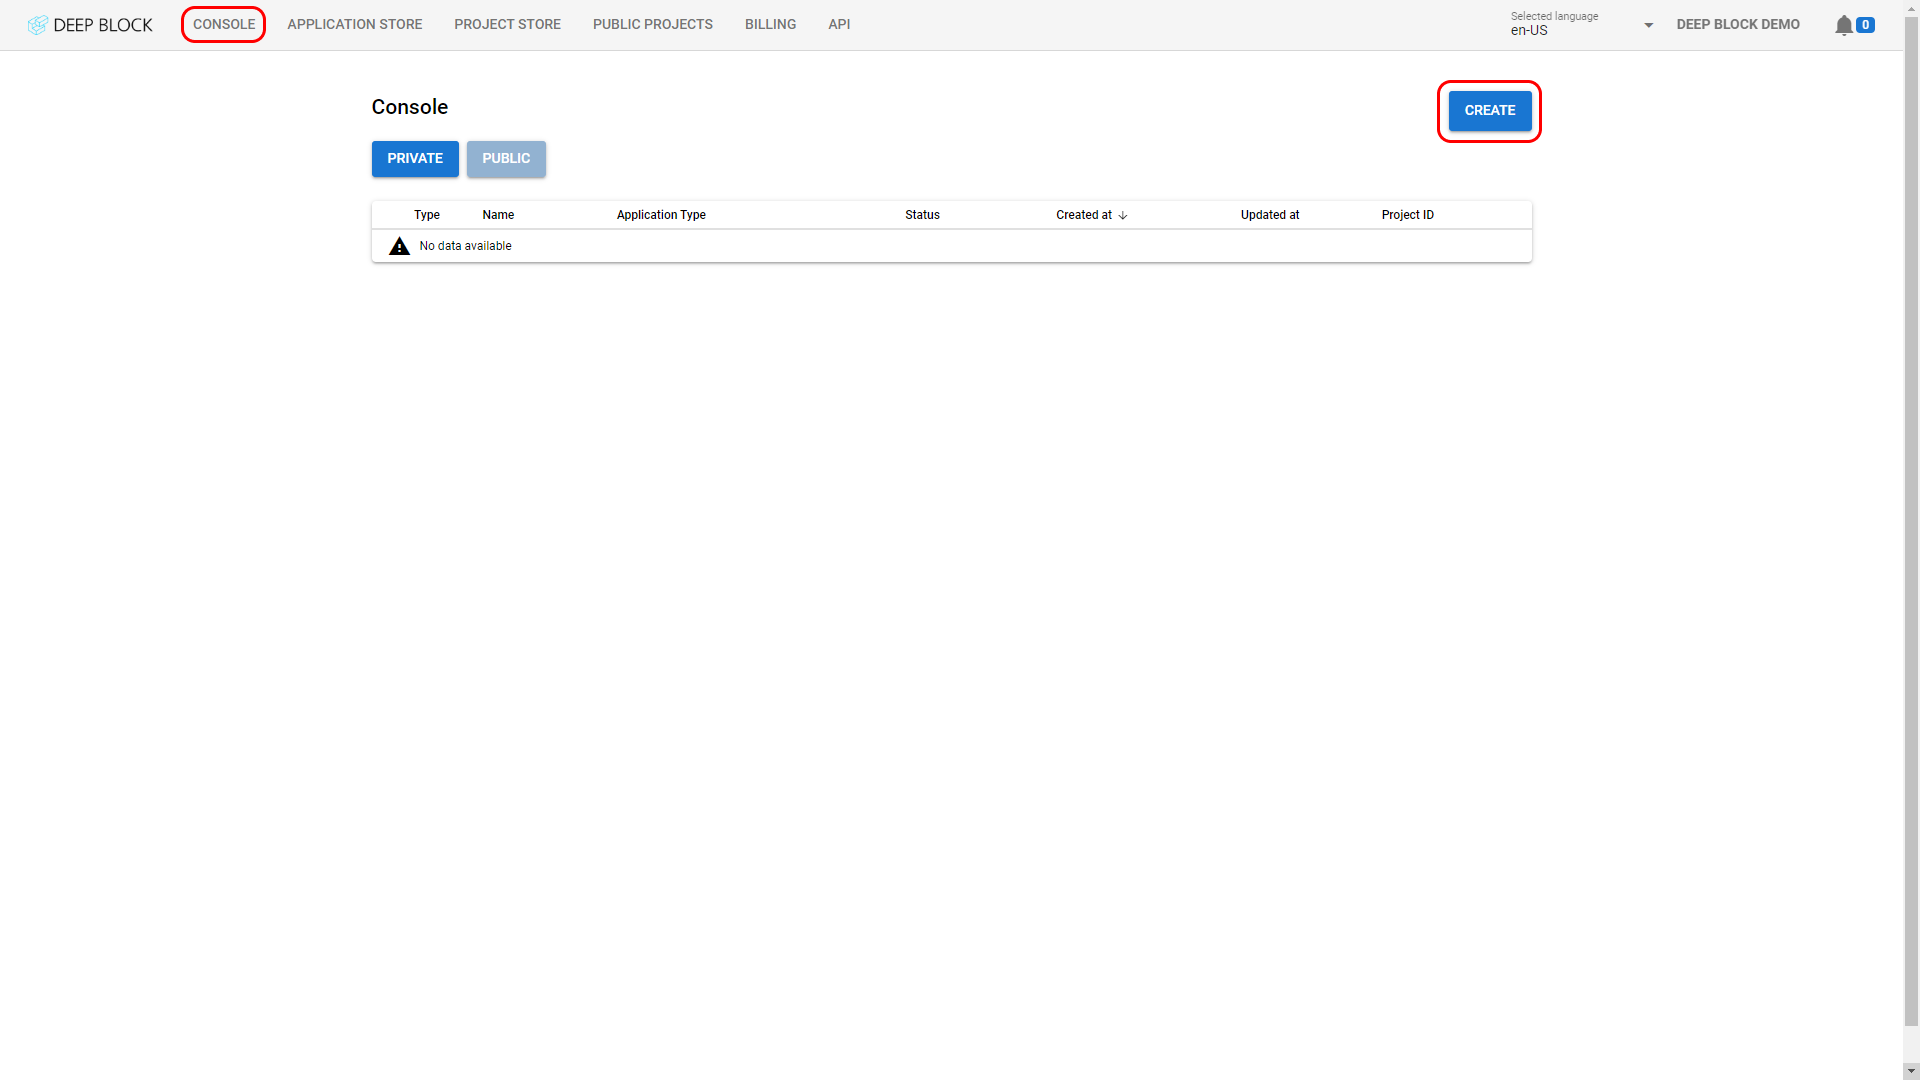
- You landed on the Project view which is the interface where you can train and use your own Machine Learning models.
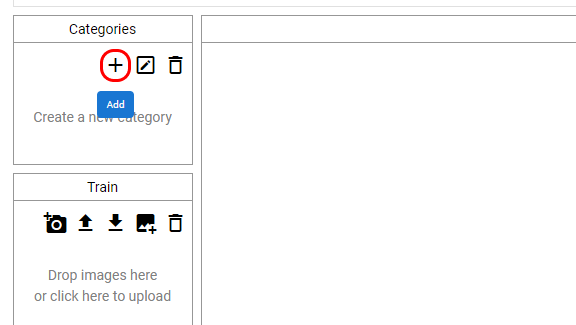
- For the purpose of this first project, we will create one category
- Click on "
 " in the Categories panel on the top-left side of the interface to add a category
 - Click on "
 " in the Categories panel to rename the category. Input a new category name and press "Enter" on your keyboard.
Step #4 - Import images
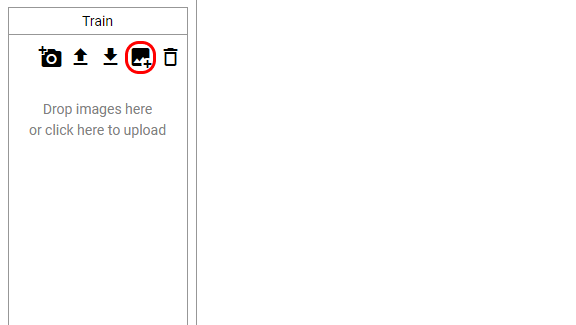
- Click on "
 " in the Train panel below the Categories panel to import your training dataset or the list of images that you wish to label.
 - Or just upload images with "drag and drop" action.
- For each category, a minimum of 300 annotations and a maximum of 4,000 annotations must be drawn to train the machine learning model.
- If you have less training data than this, please contact us.
- Even if you need support for annotation, contact us.
- After upload, images will be processed, then appear as a list in the Train panel.
- You can also upload an image in geotiff format.
- Selected images will also be displayed in the central Image panel.
- You can switch between images by clicking on each individual file in the list of the Train panel.
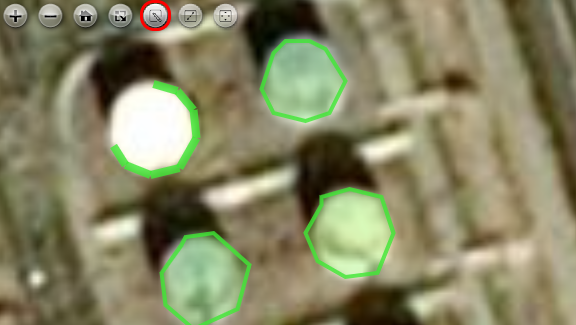
Step #5 - Draw polygons
- To train your image segmentation model, you must simply draw polygons around the objects that you wish to segment.
- Select the image you wish to label in the Train panel.
- Select a category at the Categories pane, and click on "Draw Mode
 " on the Image viewer to start drawing the polygon's boundaries around the object. This can be achieved by clicking at an adequate interval along the external lines of the object.
 - When you have drawn the border, press the “Enter” key to end drawing.
To know more about all the features of this interface, refer to Mastering the labeling tool.
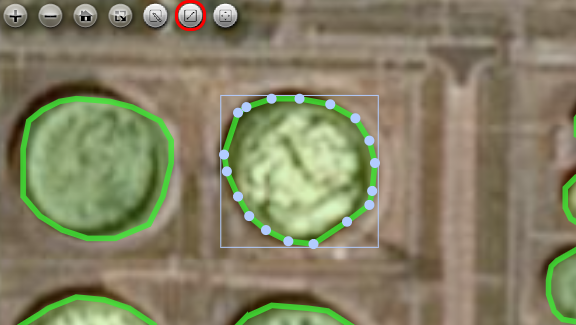
Step #6 - Label all your images
- Repeat this process until you have labeled all your images.
- If you wish to delete one polygon, click on "Select mode
 " in the Image viewer to enable the select mode, then select in the image the polygon you wish to delete and press “Delete” key to remove the chosen polygon.
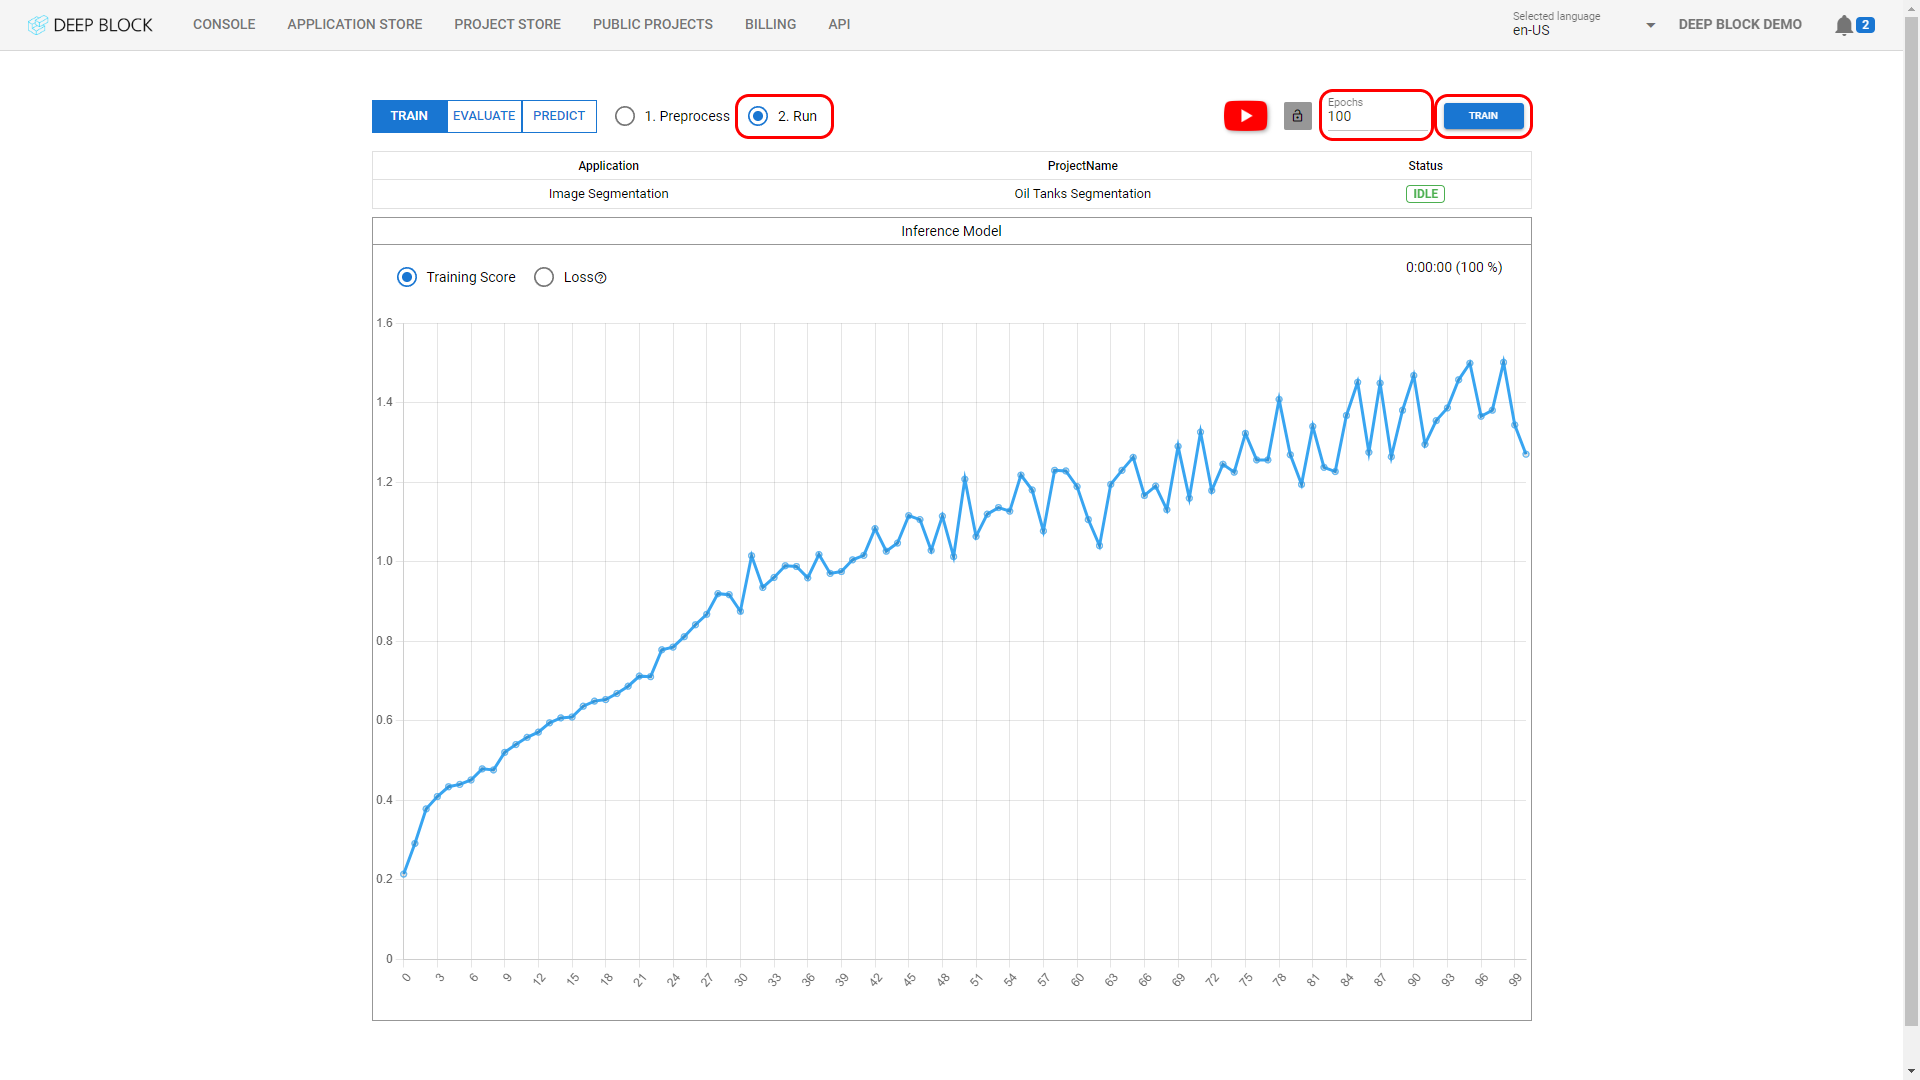
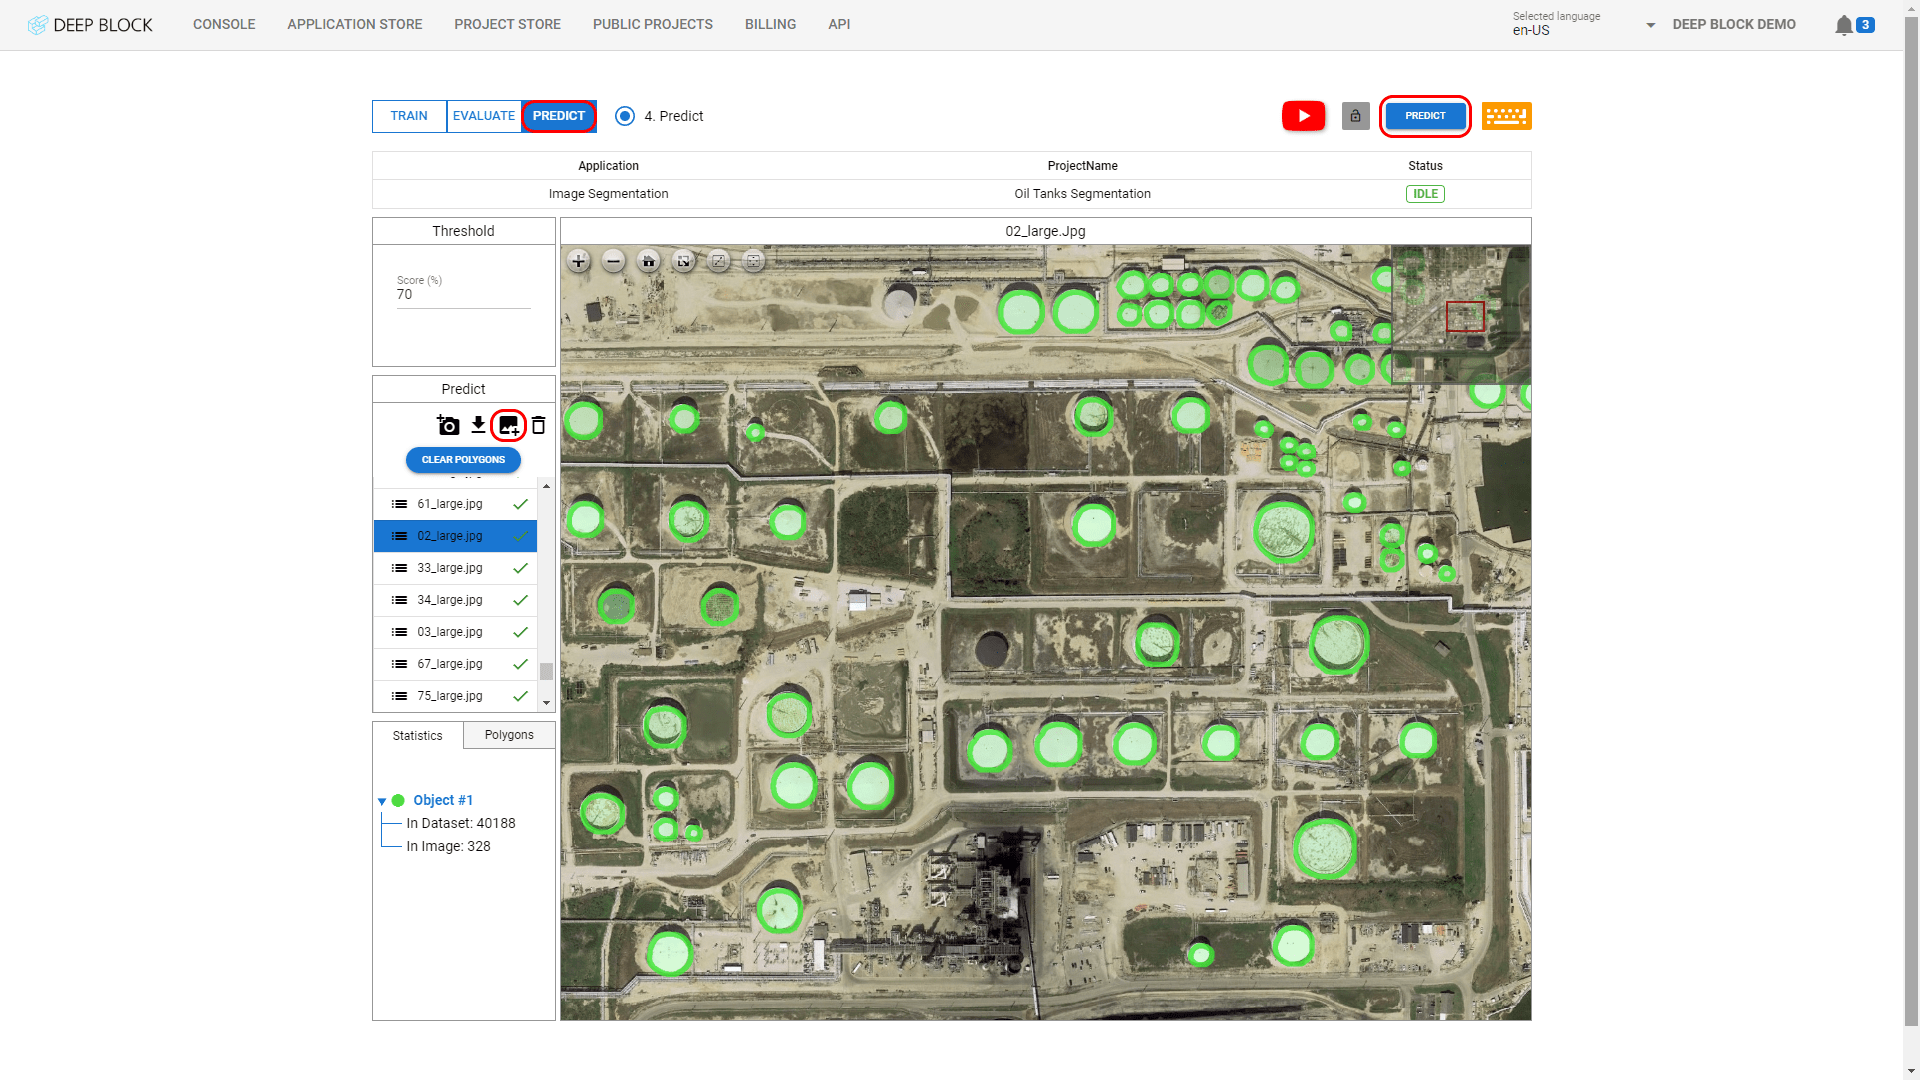
Final step - Try out your model
- Congratulations! You have completed your first AI training. Now is the time to check its prediction capabilities.
- You can try evaluating your model in “EVALUATE” mode, but if you want to see how your model works, try uploading new images that have objects that you want to find to the “PREDICT” tab.
- Click on "PREDICT" at the top left corner of the Project view to switch to the Predict Mode.
- Click on "
 " in the Predict panel below the Threshold panel to import the list of images that you wish to test your model against.
 - Click on "PREDICT" button at the top right corner of the Project view.
- After processing, the model will automatically generate polygons around the segmented objects for each imported image.
- Performance can be further improved by adjusting the threshold. If you want to increase performance further, contact us.